
Contents [hide]
USBカメラの利用
USBカメラ挿入、dmesgコマンドで、次のメッセージが追加されていることを確認。
[ 3290.950364] usb 1-1.5: new high-speed USB device number 5 using dwc_otg
[ 3291.100866] usb 1-1.5: New USB device found, idVendor=056e, idProduct=7009, bcdDevice= 1.00
[ 3291.100880] usb 1-1.5: New USB device strings: Mfr=1, Product=2, SerialNumber=0
[ 3291.100889] usb 1-1.5: Product: UCAM-DLD200BA
[ 3291.100899] usb 1-1.5: Manufacturer: Novatek
[ 3291.175879] uvcvideo: Found UVC 1.00 device UCAM-DLD200BA (056e:7009)
[ 3291.241082] uvcvideo 1-1.5:1.0: Entity type for entity Extension 5 was not initialized!
[ 3291.241098] uvcvideo 1-1.5:1.0: Entity type for entity Processing 4 was not initialized!
[ 3291.241110] uvcvideo 1-1.5:1.0: Entity type for entity Selector 3 was not initialized!
[ 3291.241121] uvcvideo 1-1.5:1.0: Entity type for entity Camera 1 was not initialized!
[ 3291.241519] input: UCAM-DLD200BA: UCAM-DLD200BA as /devices/platform/soc/3f980000.usb/usb1/1-1/1-1.5/1-1.5:1.0/input/input6
[ 3291.241912] usbcore: registered new interface driver uvcvideo
[ 3291.241918] USB Video Class driver (1.1.1)
[ 3291.321345] usbcore: registered new interface driver snd-usb-audio
(env) pi@donkeypi3chen02:~ $
USB デバイス一覧からも確認
pi@raspberrypi:~ $ lsusb
Bus 002 Device 001: ID 1d6b:0003 Linux Foundation 3.0 root hub
Bus 001 Device 008: ID 056e:7009 Elecom Co., Ltd
Bus 001 Device 003: ID 046d:c534 Logitech, Inc. Unifying Receiver
Bus 001 Device 002: ID 2109:3431 VIA Labs, Inc. Hub
Bus 001 Device 001: ID 1d6b:0002 Linux Foundation 2.0 root hub
pi@raspberrypi:~ $
デバイスのリストからも確認
(env) pi@donkeypi3chen02:~ $ ls /dev/video*
/dev/video0 /dev/video1 /dev/video10 /dev/video11 /dev/video12
ソフトでカメラの確認
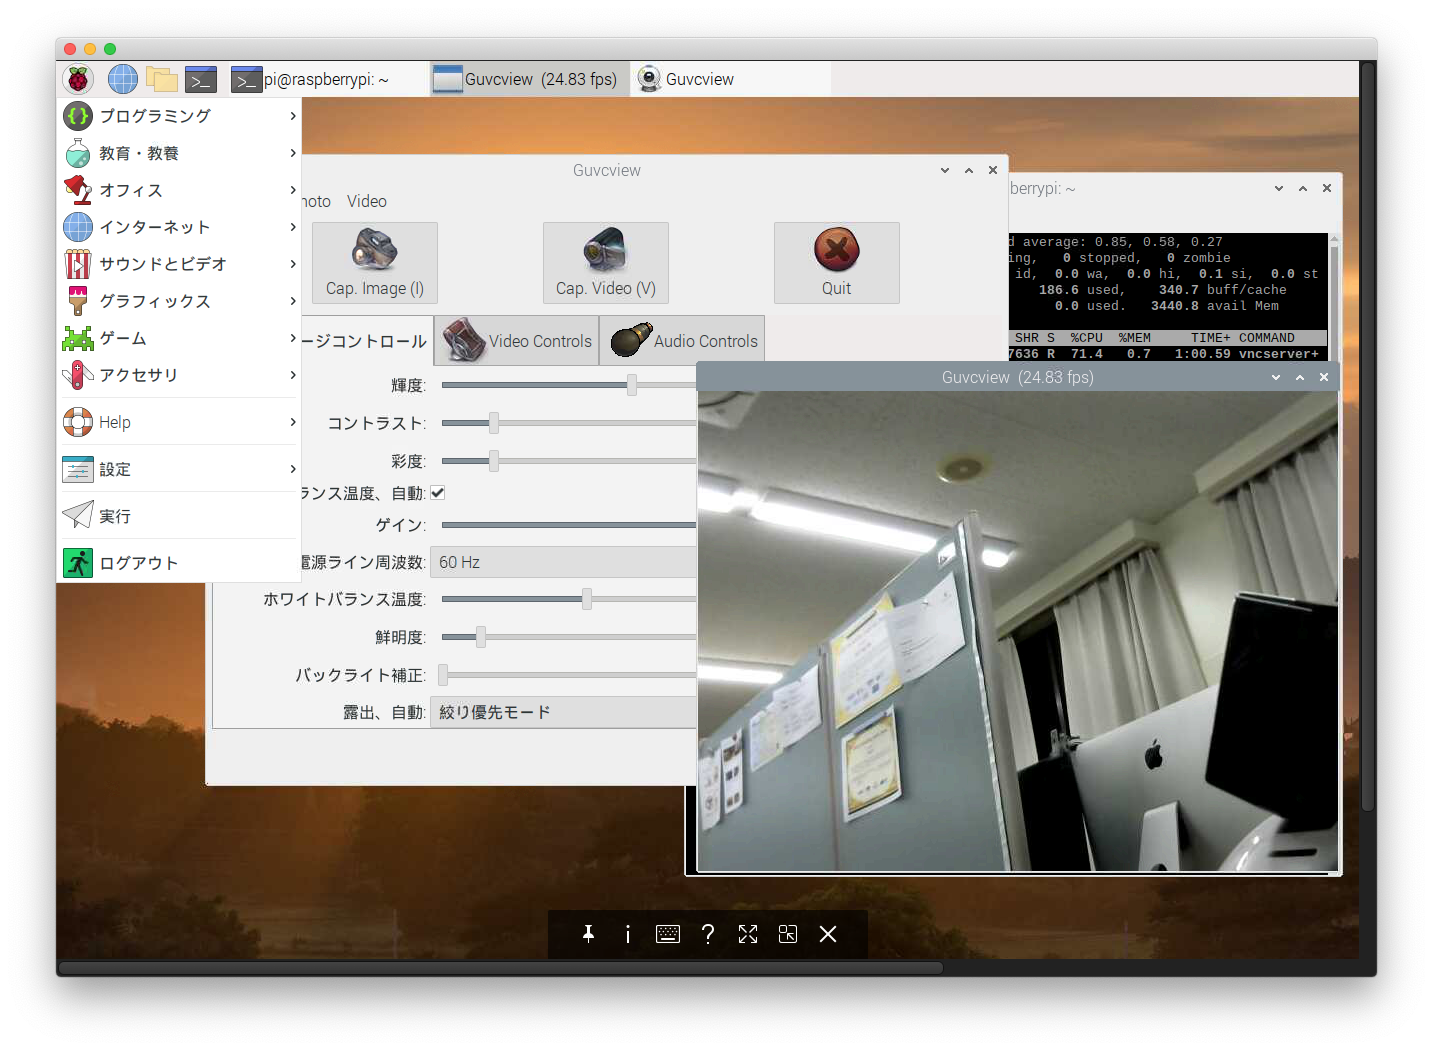
guvcview
カメラの確認するソフトは色々ありますが、今回は
guvcviewを使用してみました。pi@raspberrypi:~ $ sudo apt-get install guvcview
VNCから、Piに接続し、メニューのから
guvcviewを探して、起動してみてください。起動するとエラーで何も表示しないからあせったが、再起動したら、見れるようになった。
fswebcam
raspberrypi公式サイトでは、fswebcamを利用している
pi@raspberrypi:~/hello_ghome $ sudo apt install fswebcam
pi@raspberrypi:~ $ cd Pictures/
こちらも
pi@raspberrypi:~/Pictures $ fswebcam image.jpg
— Opening /dev/video0…
Trying source module v4l2…
/dev/video0 opened.
No input was specified, using the first.
Adjusting resolution from 384×288 to 352×288.
— Capturing frame…
Captured frame in 0.00 seconds.
— Processing captured image…
Writing JPEG image to ‘image.jpg’.
pi@raspberrypi:~/Pictures $
— Opening /dev/video0…
Trying source module v4l2…
/dev/video0 opened.
No input was specified, using the first.
Adjusting resolution from 384×288 to 352×288.
— Capturing frame…
Captured frame in 0.00 seconds.
— Processing captured image…
Writing JPEG image to ‘image.jpg’.
pi@raspberrypi:~/Pictures $
公式内蔵カメラの利用
カメラを有効にする
「sudo raspi-config」を起動して、「Legacy Camera Enable/disble legacy camera support」を選択して、Enableしてください。
カメラの回転
カメラ回転の場合、次のコマンドでファイルに v4l2-ctl –set-ctrl=rotate=90 を/etc/rc.local に追加。
pi@raspberrypi:~ $ sudo vi /etc/rc.local
カメラの認識
コマンドの次の行に「supported=1 detected=1」と表示されたら、カメラが認識されていることになります。
pi@raspberrypi:~ $ vcgencmd get_camera
supported=1 detected=1
pi@raspberrypi:~ $
写真を撮影
カメラモジュールが正常に認識できていることを確認できたら、実際に写真を撮影してみましょう。
写真撮影の操作もコマンドを入力して行います。
LXTerminalで「sudo raspistill -o image.jpg」と入力して実行します。
コマンドを実行すると、撮影画像が画面上に5秒ほど表示されます。
参考
- https://www.raspberrypi.org/documentation/usage/webcams/
- https://uepon.hatenadiary.com/entry/2017/01/22/170349 ーー RaspberryPiでUSB接続のWebカメラを使ってみる
- https://www.pc-koubou.jp/magazine/17276 ーー Raspberry Piとカメラモジュールを接続する